
Proper assembly of your Intex pool is essential for safety, durability, and enjoyment․ Always follow the provided instructions to ensure a secure and functional setup․
1․1 Overview of Intex Pool Setup
Setting up an Intex pool is a straightforward process when you follow the provided instructions․ The setup typically involves assembling the frame, attaching the liner, and installing the pump system․ Most Intex pools are designed for easy installation, with step-by-step guides to ensure everything is done correctly․ The assembly time varies depending on the pool size and type, but it generally ranges from 30 minutes to a few hours․ Proper setup is crucial for safety, durability, and optimal performance․ Always ensure the pool is placed on a flat, stable surface and that all components are securely connected before filling with water․
- Assemble the frame carefully to avoid damage․
- Attach the liner securely to the frame․
- Install the pump system according to the manual․
By following these steps, you can enjoy a safe and enjoyable swimming experience with your Intex pool․
1․2 Importance of Following Instructions
Following the Intex pool assembly instructions is paramount for safety, functionality, and longevity․ Deviating from the guidelines can lead to improper installation, safety hazards, or damage to components․ The instructions are designed to ensure a secure setup, preventing issues like leaks or structural weakness․ Additionally, proper assembly ensures compliance with safety standards, protecting users from potential accidents․ Always read and adhere to the manual to avoid costly repairs and guarantee a durable, enjoyable swimming experience․
- Ensures safety for all users․
- Prevents premature wear and tear․
- Guarantees proper functionality․
Adhering to the instructions is key to maximizing your pool’s performance and lifespan․
Safety Precautions
Always follow safety guidelines to prevent accidents․ Ensure the pool is on a flat, stable surface and avoid climbing or hanging on the pool edges․ Keep children supervised at all times and avoid using the pool during extreme weather conditions․ Proper setup and adherence to instructions are crucial for safe enjoyment․ Read the manual thoroughly to understand all safety measures and precautions before assembly and use․
- Avoid climbing or hanging on the pool․
- Supervise children at all times․
- Do not use during bad weather․
Failure to follow safety precautions can lead to serious injury or damage․
2․1 General Safety Rules for Pool Assembly
Ensure the pool is placed on a flat, stable surface to prevent tipping or structural stress․ Avoid climbing or hanging on the pool edges, as this can cause damage or injury․ Always supervise children when the pool is in use․ Never assemble or use the pool during bad weather, such as heavy rain or strong winds․ Properly follow all instructions to avoid leaks or malfunctions․ Failure to adhere to these guidelines can result in serious injury or property damage․ Safety should always be the top priority when setting up and using your Intex pool․
- Place the pool on a flat, stable surface․
- Avoid climbing or hanging on the pool edges․
- Supervise children during use․
- Do not assemble or use the pool in bad weather․
2;2 Specific Warnings and Guidelines
Never exceed the recommended water level, as overfilling can compromise the pool’s structural integrity․ Ensure all connections are tightly secured to prevent leaks․ Avoid placing sharp objects near the pool liner to prevent punctures․ Always follow the weight and capacity guidelines provided by Intex․ Do not leave children unsupervised while the pool is in use․ Regularly inspect the pool and its components for wear and tear․ Adhere to these guidelines to ensure a safe and enjoyable experience with your Intex pool․
- Do not exceed the recommended water level․
- Secure all connections tightly․
- Keep sharp objects away from the liner․
- Follow weight and capacity guidelines․
- Supervise children during use․
Preparation for Assembly
Preparation is crucial for a smooth Intex pool assembly․ Gather all tools and materials, choose a flat, stable location, and ensure the area is clear of debris․
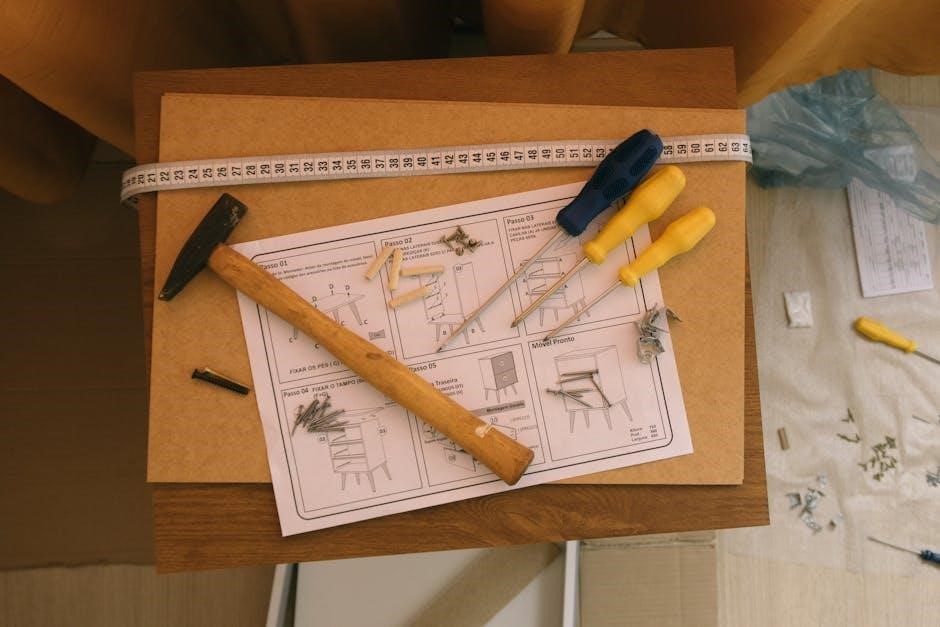
3․1 Tools and Materials Needed
Assembling your Intex pool requires specific tools and materials․ Ensure you have a wrench, screwdriver, measuring tape, and lubricant for hardware․ Gather the pool frame, liner, and pump system․ Check for all components in the package, including bolts, connectors, and hoses․ Refer to the manual for a detailed list to avoid missing parts․ Organize items in a clean, dry area to streamline the process․ Proper preparation ensures a smooth and efficient assembly experience․ Always double-check the inventory before starting to prevent delays․
3․2 Choosing the Right Location
Selecting the right location for your Intex pool is crucial for safety and functionality․ Ensure the area is flat, level, and free from obstructions like rocks or twigs․ Avoid uneven ground, as it can cause the pool to tip or leak․ Choose a spot with good drainage to prevent water from accumulating around the pool․ Keep the pool away from overhead power lines and branches for safety․ Ensure the location is accessible for assembly and maintenance․ Finally, consult local regulations or homeowner’s association rules before setting up your pool․ Proper placement ensures a safe and enjoyable experience․
Step-by-Step Assembly Process
Follow detailed instructions to assemble your Intex pool systematically․ Start by organizing components, then build the frame, attach the liner, and secure all connections tightly for stability․
4․1 Unpacking and Organizing Components
Begin by carefully unpacking all components from the box․ Ensure no parts are missing by cross-referencing with the manual․ Organize components like the frame, liner, pump, and hardware separately; Lay out tools such as wrenches and screwdrivers for easy access․ Refer to the manual for a detailed inventory list․ Pay attention to labeled parts to avoid confusion․ If the pump has separate instructions, review them after assembling the pool unit․ Estimated assembly time is approximately 30 minutes to an hour, depending on the pool size․ Double-check for any missing components before starting․ If unsure, contact customer support for assistance․
4․2 Assembling the Pool Frame
Start by assembling the pool frame, ensuring all parts are securely connected․ Attach the frame pieces together, following the manual’s guidance․ Tighten all bolts and screws firmly but avoid over-tightening․ Connect the legs and sides, ensuring the frame is level and stable․ Double-check that all connections are secure before proceeding․ If the pool has a metal frame, ensure it is fully erect and sturdy․ For inflatable models, inflate the top ring according to instructions․ Once the frame is assembled, place it on a flat, even surface, ensuring it is stable and ready for the liner installation․ Proper assembly ensures a safe and durable pool structure․
4․3 Attaching the Pool Liner
Once the frame is assembled, carefully place the pool liner inside, ensuring it fits snugly and evenly․ Smooth out any wrinkles and center the liner properly․ Use the provided hardware to secure the liner to the frame, typically around the top edge․ Follow the manual’s specific instructions for attaching clips, straps, or other fastening mechanisms․ Make sure the liner is tightly secured to prevent sagging or leaks․ Double-check the liner’s position and ensure it is not twisted or bunched up․ Proper attachment ensures a watertight seal and optimal pool performance․ Refer to the manual for any model-specific instructions․ Ensure all connections are secure before filling the pool․
Setting Up the Pump and Filter
Setting up the pump and filter ensures clean water circulation․ Follow the manual for installation, connecting hoses, and priming the pump․ Secure all connections for proper function․
5․1 Installing the Pump System
Installing the pump system involves connecting the hoses to the pool inlet and outlet․ Ensure all connections are secure to prevent leaks․ Follow the manufacturer’s instructions to prime the pump, ensuring proper water flow․ Regularly inspect the system for any damage or blockages to maintain efficiency․ Proper installation guarantees clean water circulation and extends the pump’s lifespan․ Always refer to the provided manual for specific guidance tailored to your Intex pool model․
Filling the Pool with Water
Properly fill the pool with clean water using a garden hose․ Avoid overfilling to prevent overflow․ Ensure the water level aligns with the recommended height for safe use․
6․1 Correct Water Level and Positioning
Ensuring the correct water level and proper positioning is crucial for the stability and longevity of your Intex pool․ The water level should align with the recommended height specified in the manual to avoid overfilling, which can lead to overflow or structural stress․ Position the pool on a flat, level surface to prevent uneven distribution of water weight, which could cause the pool to tilt or damage the frame․ Use a garden hose to fill the pool gradually, monitoring the water level closely․ Avoid rapid filling to prevent potential damage to the pool walls․ Once filled, ensure the pool remains level to maintain even water distribution and safety․

Testing the Pool
After assembly, test the pool by checking for leaks, ensuring all connections are secure, and verifying proper pump operation to guarantee safety and functionality before use․
7․1 Checking for Leaks and Proper Function
After assembling and filling the pool, inspect the liner and frame for any signs of damage or gaps․ Check all connections, such as the pump, filter, and valves, to ensure they are secure and functioning correctly․ Look for any water leakage around the seams or joints․ Test the pump by running it for a few minutes to ensure it operates smoothly and maintains proper water circulation․ Verify that all safety features, like the ladder and railings, are stable and firmly attached․ If everything works as expected, your pool is ready for safe and enjoyable use․
Troubleshooting Common Issues
Identify and address common assembly problems, such as misaligned frames, leaks, or malfunctioning pumps․ Refer to the manual or manufacturer support for solutions․
8․1 Addressing Assembly Problems
Common issues during Intex pool assembly include misaligned frames, leaks, or pump malfunctions․ Start by reviewing the manual to ensure all steps were followed correctly․ Inspect connections for tightness and check the pool liner for punctures․ If leaks persist, apply a patch kit as instructed․ For pump issues, verify proper installation and power supply․ If problems remain unresolved, contact Intex customer support or consult online resources for troubleshooting guides․ Addressing these issues promptly ensures a safe and enjoyable swimming experience․ Always follow safety guidelines when troubleshooting to avoid further damage or injury․
Maintenance and Upkeep
Regular maintenance ensures your Intex pool remains safe and functional․ Clean the pool floor, check chemical levels, and inspect equipment for damage․ Refer to the manual for detailed care tips to extend its lifespan and ensure optimal performance throughout the season․
9․1 Regular Pool Maintenance Tips
Regular maintenance is crucial for your Intex pool․ Start by skimming the surface daily to remove debris and ensure clean water circulation․ Use a vacuum cleaner weekly to keep the pool floor spotless․ Check pH and chlorine levels regularly and adjust them as needed to maintain safe and healthy swimming conditions․ Inspect the pool liner and frame for any signs of damage, addressing issues promptly to prevent leaks․ Additionally, clean the filter according to the manufacturer’s instructions to ensure optimal performance․ By following these steps, you can extend the lifespan of your Intex pool and enjoy a safe, enjoyable swimming experience throughout the season․
Disassembling the Pool
Disassembling your Intex pool involves draining the water, disconnecting the pump and filter, and carefully dismantling the frame․ Store all components securely for winter storage․
10․1 Winter Storage and Disassembly Instructions
Proper winter storage is crucial to maintain your Intex pool’s longevity․ Begin by draining all water and cleaning the pool thoroughly․ Disconnect the pump and filter system, ensuring all components are dry to prevent damage from freezing temperatures․ Dismantle the pool frame carefully, labeling each part for easy reassembly․ Store all components, including the liner and accessories, in a dry, protected area․ Follow the manufacturer’s guidelines to ensure everything remains in good condition for the next swimming season․