
Craftsman Garage Door Opener Manual: A Comprehensive Guide
Craftsman garage door openers boast over 200 models, making finding the correct manual challenging. This guide provides downloadable links to manuals, ensuring easy access to information.
From installation to troubleshooting, this resource covers everything you need for your Craftsman opener, including warranty details and safety features.
Explore comprehensive instructions, aiding in maintenance and understanding federal safety standards for both new and older Craftsman models.
Craftsman has been a trusted name in home improvement for decades, and their garage door openers are no exception. Over the years, the company has manufactured a vast array of models – exceeding 200 different designs – catering to diverse needs and garage configurations. This extensive history, while offering choice, can present a challenge when seeking specific information, like a replacement manual.
These openers are designed for both convenience and safety, incorporating features like remote control operation and safety reversing systems. Understanding your specific model is crucial for proper installation, maintenance, and troubleshooting. This guide aims to simplify the process of locating the correct documentation for your Craftsman garage door opener, ensuring you have the resources needed to keep your system running smoothly and safely. Whether you have a newer model or a pre-1993 opener, accessing the right manual is the first step towards optimal performance.
Understanding Model Numbers and Identification
Identifying your Craftsman garage door opener’s model number is the key to finding the correct manual and replacement parts. Given that Craftsman has produced over 200 different models, accurate identification is paramount. The model number is typically found on a sticker located on the opener’s motor unit, often on the side or back panel.
This sticker will contain a series of numbers and letters – this is your model number. It’s essential to record this number accurately before searching for documentation. Sometimes, older models may have a slightly faded sticker, so careful observation is needed. Knowing the model number allows you to bypass the overwhelming number of options and pinpoint the exact manual tailored to your opener’s specifications, ensuring correct installation, troubleshooting, and maintenance procedures are followed. Without it, finding the right information can be a daunting task.
Locating Your Specific Craftsman Garage Door Opener Manual
Finding the right Craftsman garage door opener manual is now simplified. Given the extensive range of over 200 models, a dedicated online resource is invaluable. Numerous websites offer downloadable manuals, categorized for easy navigation. Start by having your opener’s model number readily available – this is crucial for a precise search.
Many websites provide direct PDF downloads, eliminating the need for extensive browsing. Alternatively, searching “Craftsman garage door opener manual” followed by your specific model number will yield targeted results. Be cautious of unofficial sources and prioritize reputable websites to ensure the manual’s authenticity and accuracy. If you encounter difficulties, consider contacting Sears’ customer support, providing your model number for assistance in locating the correct documentation. A correct manual ensures safe and effective operation.

Installation and Setup
Proper installation requires specific tools and prioritizing safety. Connecting the door arm to the trolley, adjusting travel limits, and wiring safety sensors are key steps.
Follow the manual carefully!
Preparing for Installation: Tools and Safety
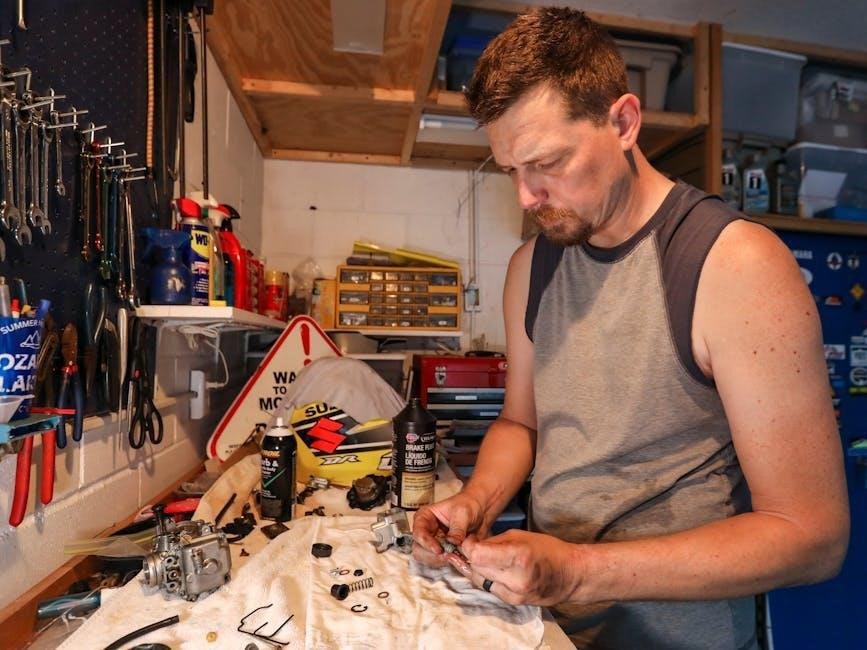
Before beginning the installation of your Craftsman garage door opener, meticulous preparation is crucial for both efficiency and, most importantly, safety. Gather the necessary tools, which typically include a ladder, adjustable wrench, screwdrivers (Phillips and flathead), pliers, a drill with various bits, safety glasses, and work gloves.
Safety is paramount. Always disconnect the power to the garage door circuit breaker before commencing any electrical work. Ensure the garage door is fully closed before starting. Never work under the door while it is disconnected from the opener or while springs are under tension. If you are uncomfortable with any aspect of the installation, consult a qualified professional. Read the entire manual thoroughly to understand all warnings and instructions before proceeding. Properly securing the opener unit and following weight limits are also vital for safe operation.
Remember to check for any obstructions in the door’s path and ensure the area is well-lit.
Connecting the Door Arm to the Trolley (One-Piece Doors)
For one-piece garage doors, connecting the door arm to the trolley requires precise alignment to ensure smooth and reliable operation. Begin by positioning the door in the closed position. Attach the door arm to the door using the provided bolts and nuts, ensuring they are securely tightened.
Next, carefully align the door arm with the trolley. The arm should connect to the trolley’s designated slot, allowing for free movement without binding. Adjust the arm’s length if necessary, using the pre-drilled holes, to achieve the correct angle. Incorrect alignment can cause the door to operate improperly or even damage the opener.
Double-check all connections, verifying that the arm moves freely with the door and that all hardware is firmly secured. Refer to the diagrams in your specific Craftsman manual for detailed illustrations and guidance.
Adjusting Travel Limits
Properly adjusting travel limits is crucial for safe and efficient garage door operation. These limits define how far the door opens and closes, preventing over-travel and potential damage. Locate the travel limit adjustment screws on your Craftsman opener – typically found on the motor unit.
To adjust the upward travel limit, turn the corresponding screw clockwise to increase the opening distance and counterclockwise to decrease it. Similarly, adjust the downward travel limit using its respective screw. Make small adjustments and test the door’s movement after each change.
Ensure the door fully opens and closes without hitting the ceiling or the floor. Precise adjustment prevents strain on the opener and ensures the safety reversing system functions correctly. Consult your specific Craftsman manual for detailed diagrams and model-specific instructions.
Wiring the Safety Sensors

Safety sensors are vital components, preventing the door from closing on obstructions. Locate the sensor wires on the opener unit and the sensors themselves, typically mounted near the floor on both sides of the door. Connect the wires to the designated terminals on the opener, ensuring correct polarity – usually indicated by color coding.
Typically, white wires connect to the common terminal, and colored wires (often red or orange) connect to the sensor terminals. Securely tighten all connections to prevent loose wiring. After wiring, test the sensors by breaking the beam while the door is closing; it should immediately reverse.
Refer to your Craftsman manual for specific wiring diagrams corresponding to your model. Incorrect wiring can disable the safety feature, compromising safety. If issues persist, double-check connections and sensor alignment before seeking professional assistance.

Operation and Safety Features
Craftsman openers include control panels, remotes, and crucial safety systems like reversing sensors. Understanding these features ensures safe and efficient garage door operation.
Regular testing of these systems is vital for continued reliable performance and peace of mind.
Understanding the Control Panel
The Craftsman garage door opener control panel serves as the central hub for operating and managing your door. Typically, it features a series of buttons allowing for manual up and down control, overriding automatic settings when needed.
Look for a “vacation lock” or “security lock” function, disabling remote access for enhanced security during absences. Many panels also include indicator lights displaying the system’s status – whether it’s armed, in operation, or experiencing an error.
Modern control panels may offer smart home integration capabilities, allowing control via smartphone apps. Familiarize yourself with the panel’s reset button, useful for resolving minor operational glitches. The panel often houses the antenna for the remote control receiver, ensuring a strong signal.
Consult your specific manual for detailed explanations of each button and feature, as layouts can vary between Craftsman models.
Using the Remote Control
Your Craftsman garage door opener remote control provides convenient, keyless access. Most remotes feature simple up and down buttons for operation. Ensure the remote is pointed directly at the garage door opener unit for optimal signal transmission.
If the remote isn’t functioning, first check the battery. A weak battery is a common cause of operational issues. Replacement batteries are typically readily available at hardware stores.
Some Craftsman remotes offer multiple buttons, allowing control of several doors if you have a multi-car garage. Programming additional remotes is usually straightforward, following the instructions in your owner’s manual.
Be mindful of the remote’s range; obstructions can interfere with the signal. Avoid leaving the remote within reach of children, and never operate the door while someone is underneath it.
Testing the Safety Reversing Sensor
The safety reversing sensor is a crucial safety feature of your Craftsman garage door opener. It prevents the door from closing on obstructions. Located near the floor on both sides of the door, these sensors emit an invisible beam.
To test, place a tall object (like a 2×4 piece of wood) in the door’s path. Activate the door’s closing sequence. The door should immediately stop and reverse direction upon encountering the obstruction.
If the door doesn’t reverse, check the sensor alignment. Ensure the indicator lights on both sensors are lit steadily. If one or both lights are off or blinking, adjust the sensors until both lights are solid.
A misaligned or dirty sensor can cause malfunctions. Regularly inspect and clean the sensor lenses with a soft cloth. A properly functioning safety reversing sensor is vital for preventing accidents.
Testing the Safety Reverse System
Your Craftsman garage door opener features a safety reverse system, designed to stop and reverse the door if it encounters resistance during closing. This system operates independently of the safety reversing sensors, providing an extra layer of protection.
To test this system, manually hold the garage door slightly closed, applying gentle resistance. Activate the door’s closing sequence. The door should stop within two seconds of encountering resistance and then reverse to the full open position.
If the door continues to exert force or doesn’t reverse, there may be an issue with the force settings or the limit switches. Consult your owner’s manual for adjustment instructions.
Regularly testing this system ensures it functions correctly, safeguarding against potential damage or injury. A properly functioning safety reverse system is paramount for safe operation.
Operation Safety Instructions
Always keep children and pets away from the garage door during operation. Never allow them to play near the door or remote controls.
Visually confirm the door’s clear path before each operation. Remove any obstructions, including vehicles, toys, or debris.
Never run the door while it is undergoing maintenance or repairs. Disconnect the power before performing any adjustments.
Do not attempt to defeat or disable the safety features, such as the reversing sensors or the safety reverse system. These are crucial for preventing accidents.
Regularly inspect the door, springs, cables, and hardware for signs of wear or damage. Address any issues promptly. Familiarize yourself with the manual for detailed safety guidelines.

Maintenance and Troubleshooting
Craftsman opener care involves lubrication, checking hardware, and addressing common issues like doors failing to close or reversing unexpectedly.
This section details solutions and battery replacement, ensuring optimal performance and longevity of your garage door system.
Care of Your Opener
Regular maintenance is crucial for the longevity and smooth operation of your Craftsman garage door opener. Periodically inspect the entire system, starting with the tracks for any dents, bends, or obstructions. Ensure they are clean and free of debris. Check all rollers and hinges, lubricating them with a garage door-specific lubricant – avoid using WD-40, as it can attract dust and grime.
Inspect the door itself for signs of wear and tear, addressing any issues promptly. Tighten all bolts and nuts, and examine the springs for proper tension (professional assistance is recommended for spring adjustments). The opener unit itself should be wiped down regularly to remove dust and dirt.
Pay attention to the safety sensors; keep the lenses clean for optimal performance. A well-maintained opener will provide years of reliable service, preventing costly repairs and ensuring your safety. Remember to disconnect power before performing any maintenance.
Troubleshooting Common Issues: Door Won’t Close
If your Craftsman garage door isn’t closing, begin by checking the safety sensors. Ensure they are aligned and the lenses are clean; even slight misalignment can trigger the safety system. Verify there are no obstructions in the door’s path – this includes the track, rollers, and the floor below.
Next, examine the limit switches, which control the door’s travel. Incorrect settings can prevent full closure. Test the remote control and wall button, replacing batteries if necessary. A faulty control panel could also be the culprit.
If the door struggles to close but doesn’t reverse, the springs may be damaged or require adjustment (seek professional help for spring issues). Finally, check for a tripped circuit breaker. If problems persist, consult a qualified technician.
Troubleshooting Common Issues: Door Reverses Unexpectedly
An unexpected door reversal often indicates a problem with the safety sensors. First, verify they are correctly aligned and free from obstructions. Clean the sensor lenses, as dirt or debris can interfere with the signal. Ensure nothing is blocking the infrared beam.
Next, inspect the safety reversing system itself. Adjust the sensitivity settings if necessary, but avoid overly sensitive settings that cause frequent reversals. Check the door’s balance; an unbalanced door can trigger the safety system.
Examine the limit switches, ensuring they are properly set. A faulty control panel or remote control can also cause erratic behavior. If the issue persists, consult a professional technician to diagnose and repair the problem safely.
Replacing the Remote Control Battery
To replace the battery in your Craftsman remote, carefully open the remote’s casing, typically by sliding or snapping it apart. Note the battery type required – commonly a CR2032. Remove the old battery, observing the correct polarity (+ and -) marked inside the compartment.
Insert the new battery, ensuring it’s oriented correctly. Securely close the remote casing, making sure all parts snap back into place; After replacement, test the remote’s functionality by pressing the button to operate the garage door.
If the remote doesn’t work, double-check the battery polarity and ensure a fresh battery was used. Reprogramming may be necessary if the remote loses its connection to the opener. Refer to the programming instructions in your opener’s manual.
Lubrication and General Maintenance
Regular maintenance extends the life of your Craftsman garage door opener. Periodically lubricate all moving parts, including the chain or belt, rollers, and springs, using a lithium-based grease. Avoid using WD-40, as it attracts dust and can cause issues.
Inspect the door tracks for obstructions and ensure they are clean and free of debris. Tighten any loose bolts or screws on the opener unit and the door itself. Check the tension of the garage door springs – do not attempt to adjust them yourself; contact a professional.
Visually inspect the safety sensors for damage or misalignment. Clean the sensor lenses with a soft cloth. A well-maintained opener operates smoothly and safely, preventing costly repairs.

Warranty Information
Craftsman offers a 90-day full warranty covering defects in materials or workmanship. A limited warranty extends to one year, covering replacement parts only.
Specific 1/2 HP motors have dedicated warranty coverage, ensuring long-term reliability and peace of mind for Craftsman opener owners.
Full 90-Day Warranty Details
Craftsman provides a comprehensive 90-day warranty from the original purchase date, safeguarding against defects in both materials and workmanship. During this initial period, Sears will diligently repair any confirmed defect at absolutely no cost to the customer. This includes both the cost of parts and the necessary labor to restore the garage door opener to full functionality.
To initiate a warranty claim within the 90-day period, customers should contact Sears directly with proof of purchase. This warranty is non-transferable and applies only to the original purchaser. It’s important to note that this full warranty covers manufacturing flaws and does not encompass damage resulting from misuse, improper installation, or normal wear and tear. Proper maintenance, as outlined in the owner’s manual, is also a condition of this warranty.
This commitment to quality ensures a worry-free experience for new Craftsman garage door opener owners.
Limited Warranty (91 Days ー 1 Year)

Beyond the initial 90-day full warranty, Craftsman extends a limited warranty from the 91st day up to one year from the original purchase date. This coverage specifically addresses defective parts, providing replacement components free of charge. However, a crucial distinction exists: the customer is responsible for all labor costs associated with the replacement.
To utilize this limited warranty, customers must contact Sears with proof of purchase and a detailed description of the defective part. Sears will then ship a replacement part, but installation must be handled by a qualified technician at the owner’s expense. This warranty, like the full warranty, is non-transferable and excludes damage from misuse, improper installation, or normal wear.
Maintaining records of all service and repairs is recommended during this period to ensure smooth warranty processing.
Warranty on 1/2 HP Motors
Craftsman garage door openers equipped with 1/2 HP motors receive specific warranty attention, recognizing the importance of this core component. While the standard 90-day full warranty and the subsequent limited warranty (91 days to one year) apply, the motor’s performance is often a key area of concern for customers.
The limited warranty extends to the 1/2 HP motor itself, meaning a defective motor will be replaced free of charge during the 91-day to one-year period. However, as with all parts under the limited warranty, the customer remains responsible for all labor costs associated with the motor’s removal and installation.
Proper maintenance, as outlined in the opener’s manual, is crucial for preserving the motor’s warranty. Damage resulting from lack of lubrication or improper use may void coverage.

Advanced Features & Considerations
Craftsman openers offer remote programming and compatibility insights. Consider upgrading pre-1993 models to meet current federal safety standards for enhanced protection and functionality.
Programming Additional Remotes
Craftsman garage door openers utilize various remote programming methods depending on the model year. For many newer models, a learn or smart button on the opener unit initiates the programming sequence. Pressing this button activates a time window, typically 30 seconds, to pair the remote.
During this window, press and hold the desired button on the new remote until the opener light flashes, indicating successful programming. Older models may require a dip switch configuration, matching the settings on the existing remote to the new one. Refer to your specific model’s manual for detailed instructions.
If programming fails, ensure the remote battery is fresh and there are no obstructions interfering with the signal. Some Craftsman openers support rolling code technology, requiring a more complex programming process outlined in the manual; Always consult the manual for the most accurate and safe programming steps.
Understanding Federal Safety Standards (Pre-1993 Models)

Prior to 1993, Craftsman garage door openers, like all others, weren’t subject to the stringent federal safety standards implemented later that year. These older models often lacked crucial safety features now considered standard, such as the photo-eye safety reversing system.
Consequently, pre-1993 openers rely heavily on force-sensing technology, which detects obstructions by measuring changes in the motor’s force during door travel. However, this system is less reliable than modern photo-eyes. It’s strongly recommended to upgrade to a newer model with enhanced safety features.
If you continue using a pre-1993 opener, frequent testing of the force-sensing system is vital. Regularly check for proper operation and consider adding supplemental safety devices. The manual for your older Craftsman opener will detail the testing procedures and limitations of its safety features.
Upgrading to a Newer Model
Considering an upgrade to a newer Craftsman garage door opener offers significant benefits, particularly regarding safety and functionality. Modern openers incorporate advanced features like rolling code technology, preventing unauthorized access, and reliable photo-eye safety sensors for obstruction detection.
Newer models also boast quieter operation, improved motor performance, and smart home integration capabilities. Replacing a pre-1993 opener is highly recommended due to the enhanced safety standards now in place. This ensures greater protection for your family and property.
When selecting a replacement, consult the Craftsman website or retailer for current models and compatibility with your garage door. Installation can be a DIY project for experienced homeowners, or you can opt for professional installation. Refer to the new opener’s manual for detailed instructions.